

Want to start a YouTube Channel in 2025? This guide will help you set your channel up from scratch.
DISCLAIMER: Links included in this post might be affiliate links. If you purchase a product or service with the links that I provide I may receive a small commission. There is no additional charge to you! Thank you for supporting me so I can continue to provide you with free content each week on my blog and on my YouTube channel!
Welcome to your step-by-step tutorial on how to set up your YouTube Channel as a beginner.
If you’re launching a brand-new YouTube channel this year, you’re probably wondering how to get it right from the start. Making sure you have a strong foundation from day one can help with your future YouTube growth.
Luckily, you’ve come to the right place!
In this guide, we will cover the basics of setting up your channel from scratch. I’ll cover everything from your channel settings to your image, tags, and description. Plus, plenty more to make sure you have a good foundation when you set up your YouTube Channel.
As always, if you’d rather watch instead of read, click the video below. Let’s get started.
How to Set Up a YouTube Channel
In this tutorial, we’re working toward two main goals:
- When someone lands on your channel, they instantly understand what your content is about and want to hit subscribe immediately.
- Behind the scenes, your channel is optimized so it actually shows up in YouTube search results.
Having a channel that looks good is important, but looks alone won’t grow your channel. A strong channel setup is a combination of aesthetics and logistics.
Step One to Set Up Your YouTube Channel: Customize Your Channel: Branding
To get started, go to YouTube and click ‘View Your Channel.’ This will take you to your channel’s homepage, where you can select ‘Customize Channel.’
You can also get there by clicking on your profile photo in the top right corner and choosing ‘YouTube Studio.’
Either way, make sure you’re in the ‘Customization’ tab. From there, click on the ‘Branding’ section to continue.
Pro tip: don’t worry about your ‘Channel Trailer’ right now. I didn’t have a channel trailer set up for years because, initially, I wasn’t sure what I wanted my channel to be about. In the beginning, focus on creating high-quality content that resonates with your audience.
The first step to set up your YouTube Channel is to pick a profile image.
Pick a profile picture
This is best if it’s a picture of you, making eye contact with the camera. You want a picture that has good lighting and that sums up what your channel is about.
Set a banner image
Your banner image is the image people see when they land on your profile.
To create your banner image, go to Canva and create a new design with a custom size. Make sure it’s sized correctly. For this, you can pull the numbers directly from YouTube (2048 x 1152).
If you don’t feel comfortable creating a design from scratch, you can also search within Canva for ‘YOUTUBE BANNER’ and you’ll see hundreds of options. Ideally, if you’re going this route, avoid designs with the ‘Crown’ as those are pro (paid) templates.
There is a trick with YouTube Banner Images, though. You’re creating a design that’s this big ⤵️
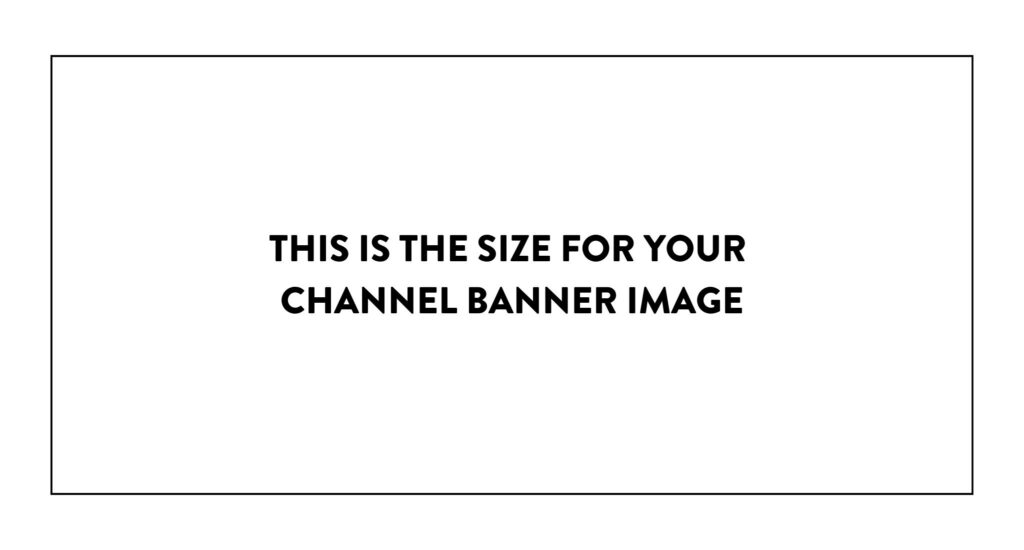
But all of the main channel information needs to fit ideally within this space ⤵️

Once you’ve finished the design in Canva, you can export it and upload it to your YouTube Channel.
Add a watermark
The watermark is an image that shows up in the bottom right-hand corner of your video. I recommend using your watermark as an opportunity to encourage viewers to subscribe to your channel.
If you’d like to create a watermark for your channel, return to Canva and design a 150 x 150 pixel image. What I then do is search for YouTube and choose one of the YouTube logos. You can keep it in YouTube’s ‘red’ or change it to one of your brand colors. You can also add text at the bottom that says ‘Subscribe’.
Experiment with how you’d like your watermark to look. If you do pay for Canva, I recommend exporting with a transparent background. Once you have a watermark that you like, upload it to your channel. Then you can choose when you’d like your watermark to appear (I usually opt for the ‘Entire Video’ option).
Here are a couple of examples of watermark styles I usually go for ⤵️

Make sure that you’re always hitting ‘Publish’ as you make changes to your channel so those changes are saved. You can then go to your channel and see them in action.
Ready to Grow on YouTube This Year?
If you’re a new YouTuber who is trying to grow your channel this year, or you’ve decided this is finally the year you become a full-time creator, then keep reading. This post (and the accompanying video) is a sneak peek inside my newest online course, The Channel Growth Lab.
While away on maternity leave, I decided to share behind-the-scenes sneak peek videos of each of my online courses. These blog posts are then built from the most helpful parts of those videos to help you figure out what you need at this stage in your journey.

The Channel Growth Lab
The Channel Growth Lab is my newest online course, designed to take you from 0 to 1,000 subscribers on YouTube. This course has over 30 training videos and a dozen templates to act as your roadmap to 1,000 subscribers. From script templates to a content calendar, this course is full of resources to help you grow.
I’m someone who loves YouTube. I’ve been posting on YouTube for over 10 years, and I know it can change creators’ lives because it has changed my life.
Is The Channel Growth Lab Right for You?
If you’re tired of piecing everything together on your own and want a true roadmap to help you start hitting your YouTube goals, then you need the Channel Growth Lab. This course will guide you through everything I’ve learned about YouTube, as well as the strategies I’ve used to help my students grow their own channels.
You can learn more and join the Channel Growth Lab here.
Step Two to Set Up Your YouTube Channel: Customize Your Channel: Background Info
Now that you have set up the aesthetics of your channel, it’s time to establish the background information. This is going to make sure your new YouTube channel is searchable and give your audience everything they need to find and subscribe.
Once you’ve saved your branding, click over to ‘Basic Info’.
Basic Info
First things first, when you set up your YouTube channel, ensure that you have all your basic information selected. This includes:
- Your name
- Unique channel handle (keep in mind that your handle can only be changed twice in 14 days, so if you’re undecided on a channel handle, make sure you have narrowed down to two options before)
- Your pronouns
Once you have your basic information set up, we will work on your description.
Description
Your channel description is really important because it’s one of the ways your channel will be searchable on YouTube. Therefore, aim to use as many relevant and searchable terms as possible when describing your channel.
Think about:
- What is your content about?
- Who is your audience?
This isn’t an ‘about me’ section, but rather it needs to be about your channel. Keep the information in your description relevant to the videos you’re going to create. And make sure that you’re including lots of juicy descriptive words (i.e., keywords) that your audience could be searching for.
If you need help with this, my online course, the Channel Growth Lab, includes a branding worksheet that guides you through identifying who you are, what type of channel you want to create, and the kind of people you are creating for. This is step one to set up your YouTube Channel, so if you need help with this, you can learn more here.
Channel URL and Links
YouTube automatically generates your profile URL, so once you’ve published your channel, you should be able to copy and paste that link to share it everywhere. However, YouTube also allows you to add additional links to your channel.
You can add links to:
- Your Website
- Your Freebie (a digital download, free course, etc.)
- TikTok
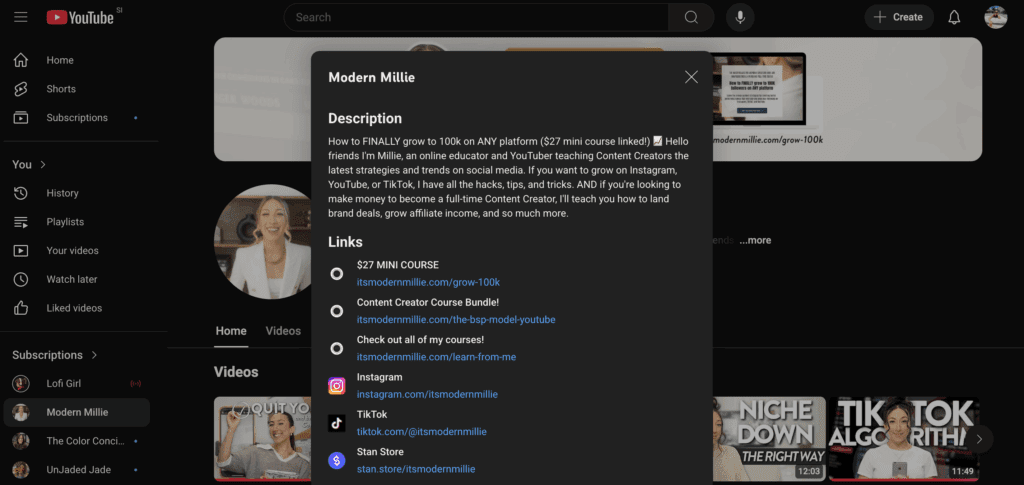
Think of your first link as your main call-to-action. It’s the one featured on your profile, so pick the thing you most want people to click. Personally, I use my free training. You might use your website, a digital download, or another key offer. Here’s an example of my channel description and links ⤵️
Now, we’re not done yet! Make sure you publish these changes before we move on to the next step in setting up your YouTube channel.
Step Three to Set Up Your YouTube Channel: Channel Settings
Monetization Settings
Once you’ve saved your channel changes, head to the sidebar and click on channel ‘Settings’.
Here, make sure you have your currency selected. Then jump to the ‘Channel Tab’.
From there, select your country of residence. All of these settings are important when your channel gets monetized. You can think of this as the first step in your journey toward monetization on YouTube.
Keywords
Once finished, we can choose keywords for your channel. These are the phrases that you want people to type in to discover you. Here’s an example of the keywords that are used for my main channel ⤵️
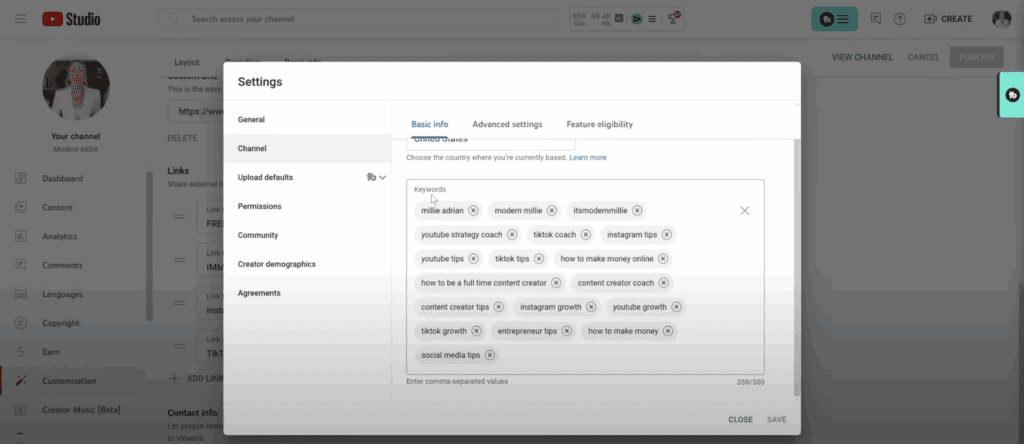
These are the terms people are typing into YouTube, and by adding them, you’re telling YouTube what your channel is about. Be specific with your keywords so the algorithm knows exactly who to show your videos to. In my example, you’ll notice they align with my content pillars.
Advanced Settings
Before moving on, there are a few advanced settings you’ll want to double-check when setting up your YouTube Channel.
First, answer the question: Do you want to set your channel as made for kids? Unless your target audience is children, you’ll likely want to select No here (that’s what I choose for my channel).
Next, take a look at your Upload Defaults. This feature lets you set up information that will automatically appear in every video description. For example, if you always include links to your social media or want to remind viewers to grab a freebie, you can add that here so it’s ready to go every time you upload.
Quick YouTube Hack
If you already have YouTube videos uploaded, there’s one final step to complete setting up your channel: updating your video descriptions and pinned comments.
Go back through your relevant videos and add your freebie (or whatever your main CTA is) to the description. Then, head to the comments section of each video and pin a comment that highlights that freebie.
Here’s why this matters: even years from now, your older videos will continue to get views. By adding these links now, you’re setting up a passive system that drives viewers to your freebie and helps you grow your email list while your channel grows.
If you found this guide helpful, make sure to read this post next! It shares eight editing tips to help you increase your YouTube watch time.
I’ll see you in the next one. Follow your joy!

")


Be the first to comment