

You can make incredible YouTube Videos with your phone! Here’s my top affordable YouTube gear for beginners.
DISCLAIMER: Links included in this post might be affiliate links. If you purchase a product or service with the links that I provide I may receive a small commission. There is no additional charge to you! Thank you for supporting me so I can continue to provide you with free content each week on my blog and on my YouTube channel!
You already know that you don’t need a fancy camera to get started on YouTube. In fact, you can make incredible YouTube vlogs using only your phone.
But how can you use your phone to the best of your abilities and to the best of its abilities? Is there gear you can invest in to make your phone vlogs better? Without breaking the bank? Absolutely.
Here is my affordable YouTube gear guide.
Affordable YouTube Gear for Beginners
Your Phone Settings
First things first, your phone settings. It doesn’t matter if you have an iPhone or Android phone, both options help you create high quality videos these days. You just have to make sure the settings are correct.
iPhone Settings
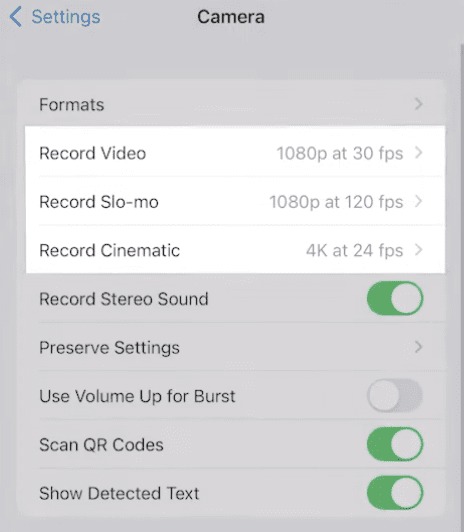
Go to your ‘Settings’ and scroll down to ‘Camera’.
For casual vlogs and day-to-day recording, I like to film on 1080p HD at 30 fps with enhanced stabilization on. These are the ‘standard’ YouTube settings and they take up less storage space on your device.
For Slo-mo I like to film on 1080 p HD at 120 fps. This is going to make your videos as crisp as possible, again without taking up too much storage space.
Lastly, for Cinematic I would use 4k at 24 fps.
Android Settings
Open up your camera and make sure it’s on ‘Video Mode’. Click the settings in the top right corner and the first thing you want to do is make sure video stabilization is on.
Next open advance recording options to turn on high bitrate & HDR10+.
Finally go back to your camera view and make sure FHD30 is selected which will record in the 1080p at 30 fps, which again is great for casual day-to-day vlogging.
If you want more help setting up your Android phone for optimal vlogging, watch this great video next.

Tripods
This is the first piece of equipment that will really make your life easier. There are so many options for tripods, from handheld versions that are great for vlogging to stand up tripods that are perfect for sit down videos. The size of your tripod will depend on what kind of videos you want to make. But there are a few things to look out for when it comes to tripods.
- Phone Mount – Make sure the tripod either has a phone mount already, or make sure you order a mount to go with it. The mount is the piece that allows your phone to connect to the tripod.
- Cold Shoe Mount – Check the mount for ‘cold shoe mount’ which is on one end, allowing you to connect a microphone or light easily.
- Bluetooth Remote – if you’re planning to record videos sitting down, you could look for tripods that come with a bluetooth remote, which will make it easy to stop and start recording without having to get up.
Affordable Tripod Options for YouTubers
- Aureday tripod, mount and remote for $14
- Manfrotto tripod for $17, mount for $21
- Joby Gorillapod for $19 (mount comes separately for $9)
- Additionally: Sandmarc Tripod for $99, and Creator Grip
Microphones
Of course, you can use the internal mic that’s built into your phone, but if you’re looking to step up your audio – I recommend a microphone.
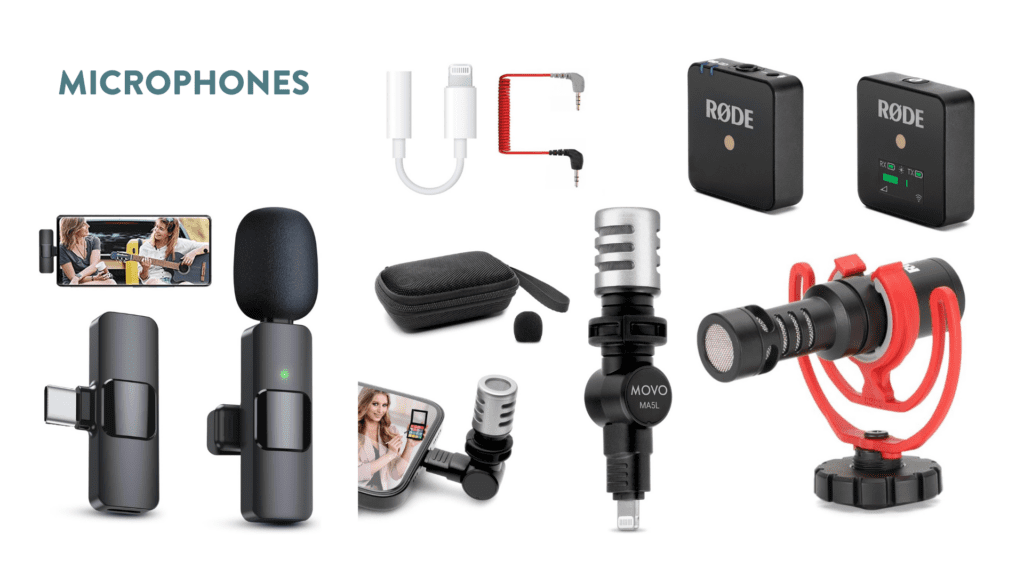
The most cost effective microphones attach directly to your phone and can pick up your voice from any distance when you’re holding the phone away from yourself. For these mics, you have options like:
For these microphones, you’ll also need pieces to connect the device to your phone. You’ll need the Apple Headphone Jack Adapter 3.5mm for $7.99 and 3.5mm Adapter Cord for Rode mic for $8.72.
Or you could choose a bluetooth microphone, which typically comes with two pieces. The first piece is the mic or transmitter that is attached to you. Then the receiver is attached to your phone. The most common one that I see on YouTube and TikTok is the Rode Wireless Go but this costs around $250.
A more cost friendly option would be:
- PQRQP Wireless Lavalier Mic for $23.
- Additionally (but not a ‘budget’ option): Rode Wireless GO
If you’d like a sound comparison for each of these microphone options, watch the video above but skip ahead to 8:15.

And keep in mind that when you’re choosing a microphone, read the reviews and pet peeves from people who’ve used that microphone before. Is it simple to use? Easy on the go? Does it rub against your clothes or hair?
A quick note: when you’re recording with a microphone that plugs into your phone, you usually won’t be allowed to hear the audio back. You will need to unplug the microphone to listen to the audio.
Lighting
Obviously your best source of light will always be natural lighting, yes this means filming by a window when it’s nice and bright outside. However, you might not always have that luxury which means getting an alternative light source.
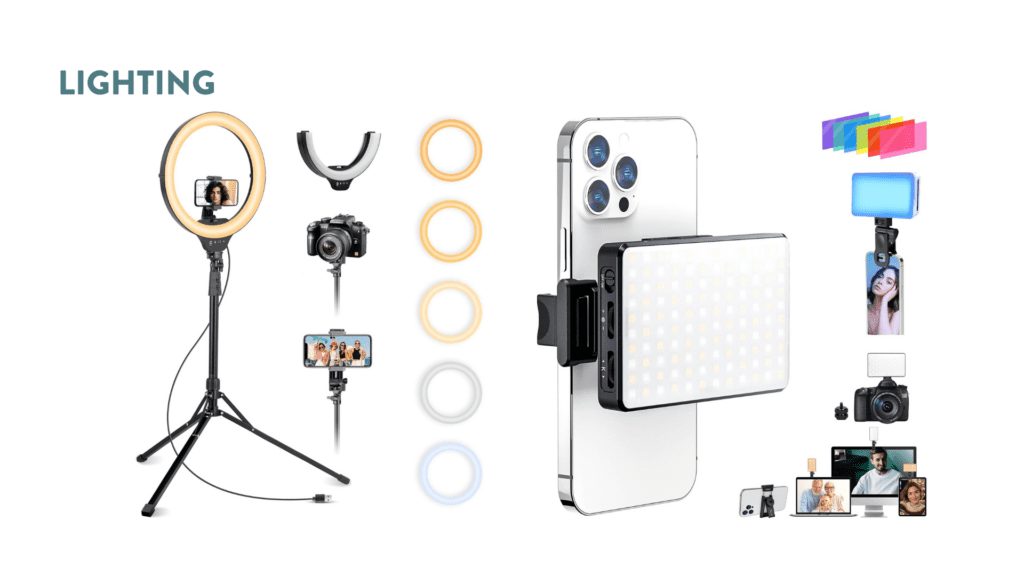
If you’re making sit down videos where you’re talking to the camera, you could definitely use a ring light on a tripod that you can set up. I like the ring light/tripod combo like this Auerday 14” selfie ring light with 62” tripod for $36.
But if you’re vlogging and moving around, you’re going to want something smaller and more compact. My personal favorite is the Meixitoy LED Light which you can get for $29. It comes with a diffuser, clip, adapter, charger and colored filters.
For a ‘non budget’ option, I love the Sandmarc Ringlight.
Attachments, Accessories and Storage
Lastly, I want to go over the accessories. This will be anything else that I like to use when filming vlogs, that we haven’t already gone over. Things like extra lenses, storage, etc.
Attachable Lenses
I like to use attachable lenses when I’m filming on my phone. When you’re filming on your phone in the ‘wide angle’ lens, the aperture is set to lower than the default. This means that even less light is getting through and can reduce the quality of your video.
That’s where attachable lenses come in handy. That way you can record on 1x zoom or the standard camera, and the quality will be better, you can film in low light situations better, and then you attach a wide angle lens to have that effect.
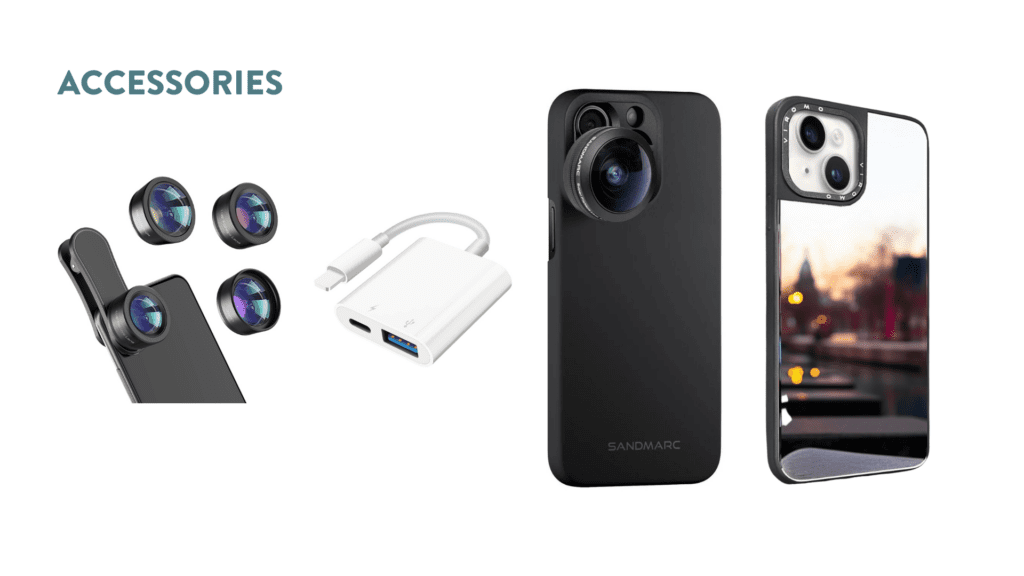
The attachable lenses that I recommend:
- 3-in-1 lens from Amazon for $18
- Sanmarc lens for $129 (obviously not a good cost effective option)
If you would like to see each of these lenses in action – watch the video above (but skip ahead to 16:40).
Mirrored Phone Case
I always recommend filming on your back camera because that is the best way to get high quality videos from your phone. But if you’re worried about whether or not you’re in frame, you could get a mirrored phone case. You can pick one up for $17 on Amazon. This way you can make sure that you’re always in frame.
Just make sure that when you’re filming you’re not looking at yourself. You need to be looking at the camera.
Camera Wipes
You don’t need these… but I wanted to include them because there have been too many times where I’ve shown videos to my husband and his question for me is, “Why is this blurry? Did you clean your lens off first?”
For me, buying camera wipes was more a way to remind myself that I needed to clean my camera before recording. You can honestly get a huge box of these for about $5, and then you don’t have to worry about setting your phone down in your ketchup anymore…
Storage
Last but not least is storage. Recording videos takes up a lot of space on your device and you might find yourself running out of storage space sooner than you’d think or really than you’d like. There are so many storage options depending on what phone you have, but here are some that I recommend.
You can use a lightning to USB adapter to back your videos up to a USB drive for $12.99 on Amazon. Or if you want to back your videos up to an SD card, you can get a lightning to camera SD card adapter for $28.99. If you’d like to learn more about both of these options, you can watch this video tutorial!
Affordable Creator Gear Options
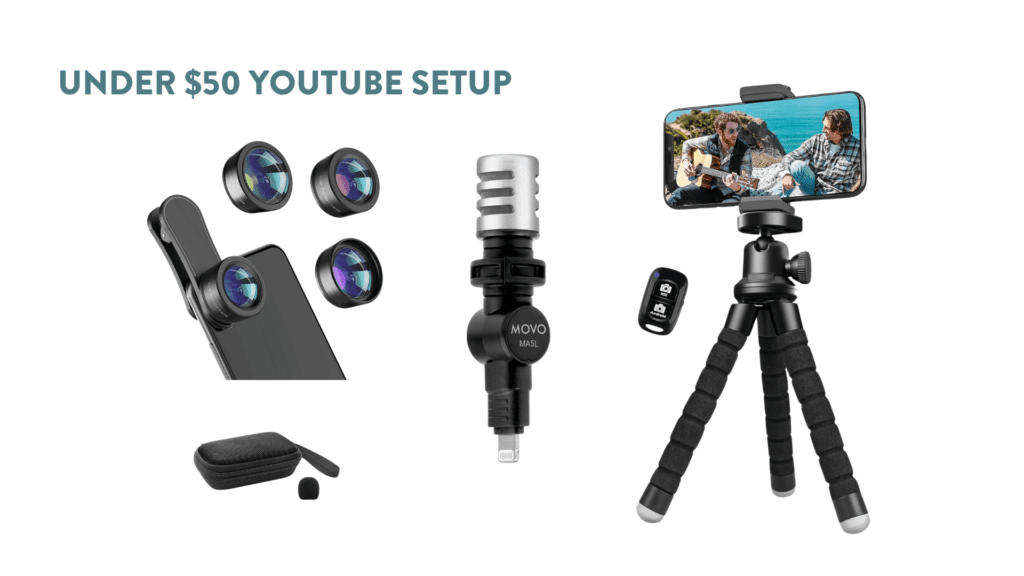
Under $50 Affordable YouTube Gear Setup
If you’re someone who wants the most cost effective pairing, this is going to be your under $50 set up.
- The Audreday Tripod (that comes with a mount and bluetooth remote) for $14.99
- The Mavo Mic for $29.95
This setup will help you start to feel more official, it’ll definitely help with your video quality, and together it comes to around $45.
If you wanted to add the attachable wide angle lens, you could buy the Amazon 3-in-1 kit that works with any phone. Adding this would make this setup on $63 and could really help your filming in low-light situations.
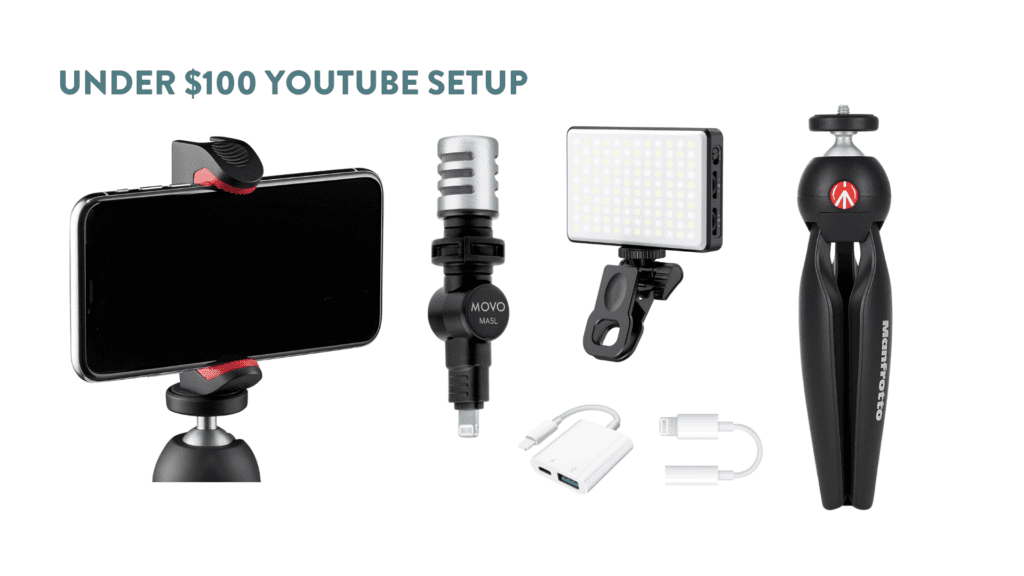
Under $100 Affordable YouTube Gear Setup
If you feel comfortable spending around $100, you can get a really thorough setup for YouTube vlogging with your phone.
Altogether this setup comes to about $86. However, if you get the Manfrotto mount instead of the $9 one, the total would be $98.88 (so just under $100!)
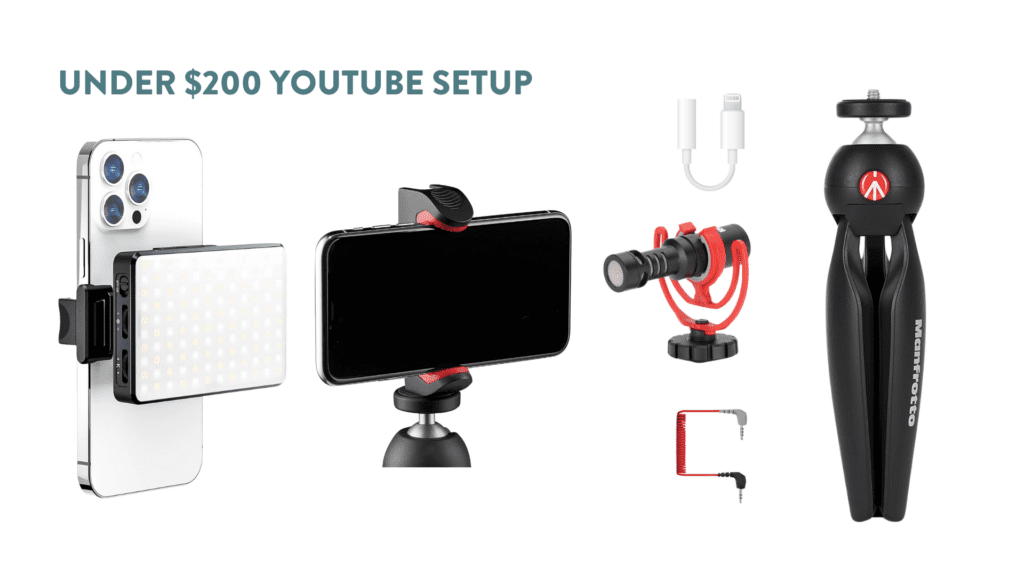
Under $200 Affordable YouTube Gear Setup
Now for the option that’s under $200.
- Manfrotto tripod for $17
- Manfrotto Mount for $21.94
- Rode Microphone for $42
- Wires for iPhone usage for $8.72 + $7.99
- Auriani LED light for $29.99
This actually only comes to about $127.65, so it’s still well under $200! Plus, it’s a really good vlogging setup for your phone. The $200 setup makes sure you have a really durable microphone (with all the needed cables), a sturdy tripod and a really good quality light.
This light is a bit different from the Meixitoy because it attaches to the back of your phone, instead of using the mount. It works for this setup because then you can use the Rode microphone and light at the same time.
And of course, there are so many ways to piece all of this together, depending on what you want and what’s most important for you to get started.
The final optional thing I am going to share with you is the Sandmarc Wide Lens and Case. I know this isn’t an affordable piece of YouTube gear, but it really is such a high quality lens. It’s available for $129.99 and only compatible with the iPhone (at this time).
Once you’ve got your perfect setup, all you really need to do is start filming and uploading your videos. That way you can start growing your channel! To help you get your first 1,000 subscribers, I recommend reading this post next. There I’m sharing 5 steps you can start implementing today to grow faster on YouTube.

")

")
")


Be the first to comment